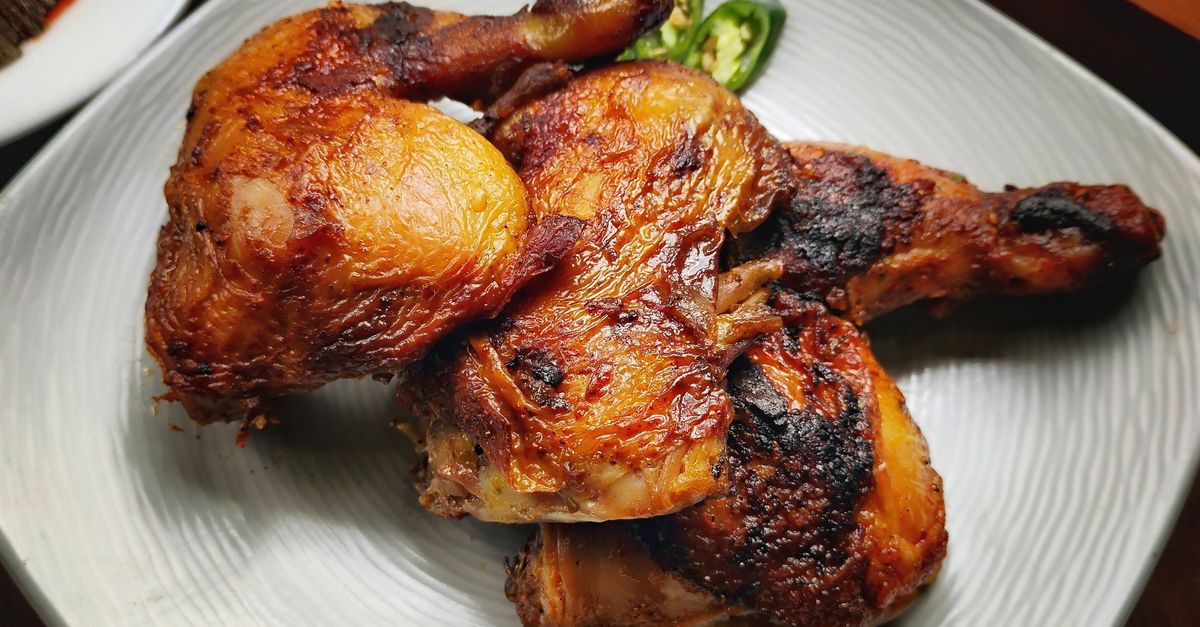
Roasted chicken thighs are a weeknight staple for many home cooks, myself included. They’re affordable, packed with flavor, and generally easy to prepare. Yet, in countless kitchens, the dream of golden-brown, shatteringly crispy skin and succulent, juicy meat remains just that—a dream. Instead, we often pull out a pan of chicken with flabby, pale skin, a watery pan sauce, and meat that, while cooked, lacks that irresistible tenderness. It’s a common frustration, and one I wrestled with for years until I started digging into the science and technique behind truly great roasted chicken. It’s not about a fancy recipe or exotic ingredients; it’s about understanding a few fundamental principles that most home cooks inadvertently overlook.
I used to blame my oven, my pan, or even the chicken itself. I’d crank up the heat, hoping for a miracle, only to be met with smoke and still-soggy skin. I’d try basting, thinking it would keep the meat moist, unaware it was actively sabotaging my crispy skin ambitions. What changed everything for me was realizing that achieving that perfect balance of crisp and juicy isn’t about more effort, but smarter effort. It’s about respecting the chicken, its fat, and the heat you apply to it. Once I understood these core mistakes, my roasted chicken thighs went from consistently disappointing to a dish I was proud to serve every single time. And the best part? The fixes are incredibly simple and require no special equipment.
Key Takeaways
- Ensure chicken thighs are thoroughly dry before seasoning to promote optimal crisping.
- Season the chicken generously and allow it to sit, uncovered, in the refrigerator for at least 30 minutes to draw out moisture and deepen flavor.
- Start with a cold pan and gradually heat the chicken, skin-side down, to render fat slowly for maximum crispness.
- Avoid overcrowding the pan to prevent steaming and encourage even browning and crisping.
- Resist the urge to baste, as adding moisture during roasting will hinder skin crispness.
The Moisture Menace: Why Wet Skin is Your Enemy
The single biggest culprit behind flabby chicken skin is excess moisture. Think about it: water turns to steam, and steam prevents crisping. It’s a simple thermodynamic truth, yet it’s the most commonly ignored step. I used to pat my chicken dry with a paper towel for a mere 30 seconds and call it a day, completely missing the crucial residual moisture that lurked beneath the surface. This surface moisture creates a steamy barrier between the heat and the skin, effectively boiling the skin instead of crisping it. No matter how high your oven goes, if the surface is wet, it will never achieve that coveted crunch.
What changed everything for me was a two-pronged attack on moisture. First, after rinsing (if you rinse your chicken, which is debatable and often unnecessary, but if you do, do it properly!), or simply removing from packaging, I now aggressively pat every crevice of the chicken thigh dry with paper towels. I’m talking top, bottom, and especially under the edges of the skin. Don’t be shy. Then, and this is the game-changer, I place the seasoned chicken thighs, skin-side up, on a wire rack set over a baking sheet, and let them air-dry in the refrigerator for at least 30 minutes, but ideally 2-4 hours, or even overnight. This extended air exposure allows surface moisture to evaporate, concentrating flavor and setting the stage for truly crispy skin. You’ll literally see the skin become tauter and slightly drier. It feels counter-intuitive to put uncovered meat in the fridge, but trust me, for crispy chicken, it’s non-negotiable.
The Cold Start Revelation: Rendering Fat, Not Burning It
Most recipes tell you to preheat your pan. This works fine for many things, but for chicken thighs, it’s a mistake that prevents optimal fat rendering. When you put a cold, fatty piece of chicken skin-side down into an already hot pan, the sudden high heat can cause the skin to seize up and burn before the fat underneath has a chance to slowly melt and render out. You end up with skin that’s charred on the outside but still has a thick, unrendered layer of fat clinging to the meat, leading to a greasy texture rather than a crisp one.
My breakthrough came when I started using a cold pan method for searing. I place the chicken thighs, skin-side down, into a cold oven-safe skillet (cast iron or stainless steel work best for this technique, avoiding non-stick which often struggles with high, sustained heat). Then, I turn the heat to medium-low and let the pan and chicken gradually come up to temperature. This slow, gentle heat coaxes the fat out of the skin, rendering it slowly and thoroughly. I let them cook skin-side down for a good 10-15 minutes on the stovetop, sometimes even longer, until a significant amount of fat has rendered into the pan and the skin is deeply golden and blistered. This initial stovetop sear not only pre-crisps the skin but also builds incredible flavor in the rendered fat, which will become your delicious pan sauce.
The Seasoning Strategy: More Than Just Salt and Pepper
Many home cooks season chicken just before cooking, with a sprinkle of salt and pepper. While this is better than nothing, it’s a missed opportunity to not only build flavor but also further enhance crispiness. Salt is a desiccant; it draws moisture out. When applied properly, it can work wonders for your chicken skin.
What I’ve learned is to season early and generously. After patting the chicken dry, I liberally season both sides, especially the skin, with kosher salt. Don’t be afraid to use a good amount – a typical thigh can handle about 3/4 to 1 teaspoon of kosher salt. The salt will begin to draw out moisture from the skin. If you’re air-drying the chicken in the fridge (as mentioned in the first point), the salt will help this process, and the moisture will evaporate. Beyond salt, consider a pinch of baking powder (yes, baking powder!) mixed with your spices. About 1/2 teaspoon of baking powder per pound of chicken, mixed with your salt and other seasonings, creates tiny air bubbles on the skin’s surface, promoting an even crispier texture. This is a trick I learned from professional chefs, and it’s shockingly effective without imparting any off-flavors. Let the seasoned chicken rest for at least 30 minutes, or as long as it’s air-drying, before cooking.
The Overcrowding Oversight: Give Your Chicken Space
We’ve all been there: a large batch of chicken, a single pan, and the temptation to cram as many thighs as possible into it. This is a critical error. When you overcrowd a pan, whether on the stovetop or in the oven, the chicken thighs release moisture. With nowhere for that moisture to escape, it essentially steams the chicken rather than allowing it to brown and crisp. The air circulation is compromised, and you’re left with pale, soggy chicken, no matter how perfectly you executed the previous steps.
My rule of thumb is simple: give each thigh its personal space. This means ensuring there’s at least an inch of clear space around each piece of chicken in the pan. If you have too many thighs for one pan, use two. It’s better to have two pans of perfectly crispy chicken than one pan of disappointing, steamed chicken. This generous spacing allows hot air to circulate freely around each piece, promoting even browning and maximum crispness. It might take a minute longer to wash an extra pan, but the results are undeniably worth it.
The Basting Blunder: Don’t Re-Wet Your Work
Many classic roasting recipes call for basting—spooning pan juices over the meat during cooking. This practice is fantastic for some cuts of meat or for keeping lean chicken breasts moist. However, for achieving crispy chicken thigh skin, it’s an absolute no-go. You’ve worked hard to dry out that skin, render its fat, and get it perfectly golden. Reintroducing moisture by basting is like pouring water on a campfire you’re trying to build.
Resist the urge to baste. The rendered fat and the natural juices from the chicken thighs will keep the meat moist from within. If you’re worried about the meat drying out, you’re likely overcooking it. With the cold-start method and the skin-down sear, the meat will cook evenly and stay incredibly juicy. The rich pan drippings will be there for you to make a beautiful pan sauce after the chicken is done, not during. Let the chicken do its thing in the oven, undisturbed, so that skin can reach its full, glorious crispy potential.
Frequently Asked Questions
Q: Do I really need to air-dry chicken thighs in the fridge for hours?
A: While 30 minutes is better than nothing, and will still yield decent results, aiming for 2-4 hours, or even overnight, makes a noticeable difference. The longer the surface moisture evaporates, the crispier your skin will be. It’s a passive step that requires no active cooking, just a little planning ahead.
Q: What kind of pan is best for roasting chicken thighs with crispy skin?
A: A heavy-bottomed, oven-safe skillet is ideal. Cast iron or stainless steel pans are excellent choices because they conduct and retain heat very well, which is crucial for the cold-start searing method. Avoid non-stick pans as they often don’t perform as well under high, sustained heat and their coatings can degrade.
Q: My chicken skin is crispy, but the meat is still a little dry. What am I doing wrong?
A: Dry meat usually indicates overcooking. Chicken thighs are best cooked to an internal temperature of 170-175°F (77-79°C), which is slightly higher than breast meat, but still allows them to remain juicy. Use an instant-read thermometer inserted into the thickest part of the thigh, avoiding the bone. Also, allow the chicken to rest for 5-10 minutes after cooking; this allows the juices to redistribute, leading to more tender and moist meat.
Q: Can I use this method for other chicken pieces, like drumsticks or a whole chicken?
A: The principles of drying the skin, generous seasoning, and not overcrowding apply to all chicken pieces. However, the cold-start pan-sear method works best for pieces with substantial skin on one side, like thighs and drumsticks. For a whole chicken, a thorough drying period, baking powder in the seasoning, and roasting at a higher temperature for part of the cook time will help with crispy skin, but the pan-sear isn’t typically practical.
Q: What should I do with all the rendered fat in the pan?
A: Don’t throw it away! That rendered chicken fat (schmaltz) is liquid gold. You can drain most of it off after the initial sear, leaving just enough to prevent sticking. Use the drained schmaltz for roasting vegetables, frying eggs, or making incredibly flavorful gravies and sauces. The bits left in the pan, combined with a splash of broth or wine, make an amazing pan sauce to serve with your crispy chicken.
Conclusion
Achieving that elusive perfect roasted chicken thigh — crispy skin, juicy meat, and rich flavor — isn’t a culinary mystery. It boils down to a few intentional steps that address the common pitfalls of moisture, fat rendering, and heat management. By embracing the simple fixes of air-drying, the cold-start sear, generous and early seasoning, giving your chicken ample space, and resisting the basting urge, you’ll transform your roasted chicken from a source of frustration into a consistent triumph. These aren’t just tips; they are fundamental shifts in approach that will elevate your home cooking. Try these techniques next time you’re roasting chicken thighs, and prepare to be amazed by the difference. Happy cooking!