Have you ever pulled a batch of cookies from the oven, anticipating that perfect soft, chewy bite, only to find they’re as dry and crumbly as sawdust? It’s a disheartening experience, especially after meticulously measuring ingredients and following a recipe. I’ve been there countless times in my early baking days, scratching my head, wondering why my cookies never had that bakery-quality chewiness. I’d try different recipes, convinced it was the formula, but the results were often the same: crumbly disappointment.
The truth is, achieving a perfectly chewy cookie isn’t about some secret ingredient or complex technique. It’s about understanding a few fundamental principles of baking and making small, deliberate adjustments that prevent moisture loss and promote tenderness. The mistake I see most often, and one I made for years, is treating all cookie dough the same, or overlooking seemingly minor details that have a massive impact on the final texture. What changed everything for me was realizing that every step, from butter temperature to cooling method, plays a critical role in the cookie’s internal structure and moisture retention. Once you grasp these shifts, you’ll consistently bake cookies that are wonderfully chewy, with just the right amount of crispness at the edges, proving that dry, crumbly cookies are entirely preventable.
Key Takeaways
- Ensure butter is truly room temperature and cream it correctly to incorporate sufficient air without overmixing.
- Adjust sugar ratios, prioritizing brown sugar for its moisture and flavor, and consider adding a touch more liquid or an egg yolk for tenderness.
- Avoid overbaking at all costs; pull cookies when edges are set but centers still look slightly underdone.
- Optimize your cooling process by finishing on a wire rack to prevent steam buildup and retain chewiness.
The Overlooked Power of Butter Temperature and Creaming Technique
When a cookie recipe calls for “room temperature butter,” most home bakers, myself included for a long time, assume this means butter that’s merely soft enough to dent with a finger. The reality is, true room temperature butter (around 67°F/19°C) is far more specific and critical than we often realize. If your butter is too cold, it won’t cream properly with the sugar, leading to a dense dough with poor air incorporation. If it’s too warm, bordering on melted, it won’t create the necessary air pockets and will result in a greasy, flatter cookie that dries out quickly.
In my experience, getting the butter just right is step one to chewy cookies. I used to pull butter from the fridge an hour before, but on a cold day, it simply wasn’t enough. Now, I aim for butter that can be easily pressed, leaving a clean indent, but still holds its shape. A good test: if you can squish two sticks together easily, it’s probably perfect. If it’s too soft or shiny, pop it back in the fridge for 10-15 minutes.
The second part of this equation is creaming technique. This isn’t just mixing; it’s aerating. When you cream butter and sugar together, the sugar crystals cut into the butter, creating tiny air pockets. These air pockets expand during baking, contributing to the cookie’s lift and, crucially, its tender, chewy texture. The mistake I often made was under-creaming, resulting in less air and a denser cookie. Aim to cream for 2-3 minutes on medium speed, or longer if doing by hand, until the mixture is visibly lighter in color and fluffy. It should look like whipped clouds, not just combined ingredients. This aeration is foundational to moisture retention – more air pockets mean a lighter, softer crumb that resists drying out.
Sugar Ratios and Their Unsung Role in Moisture Retention
Sugar is often seen simply as a sweetener, but in cookies, it plays a far more complex role, especially when it comes to texture. Different sugars behave differently, and understanding this was a game-changer for my cookie baking. The key insight? Brown sugar is your best friend for chewy cookies.
Brown sugar contains molasses, which is hygroscopic, meaning it attracts and retains moisture. This molasses content not only imparts a richer, more complex flavor but also ensures your cookies stay moist and chewy long after they’ve cooled. Granulated sugar, on the other hand, is a dry sweetener. While essential for structure and spread, too much granulated sugar can lead to a crisper, more crumbly cookie.
Consider a classic chocolate chip cookie. Many recipes call for a 50/50 split or even a higher ratio of granulated to brown sugar. In my kitchen, I’ve found that increasing the brown sugar ratio, often to a 2:1 or even 3:1 brown to granulated sugar, dramatically boosts chewiness. For example, if a recipe calls for 1 cup total sugar, I might use ¾ cup packed brown sugar and ¼ cup granulated. This simple shift, without changing any other ingredient amounts, made my cookies go from good to truly exceptional. The molasses also contributes to a slightly chewier bite and a richer caramel note. Don’t be afraid to experiment with adjusting this ratio in your favorite recipes; you’ll be amazed at the difference it makes.
The Perils of Overbaking and the ‘Underdone’ Strategy
This is, without a doubt, the single biggest culprit behind dry, crumbly cookies. Overbaking is a common and often innocent mistake, driven by the desire for perfectly golden edges. But here’s the counter-intuitive truth: the perfect chewy cookie looks slightly underdone when you pull it from the oven.
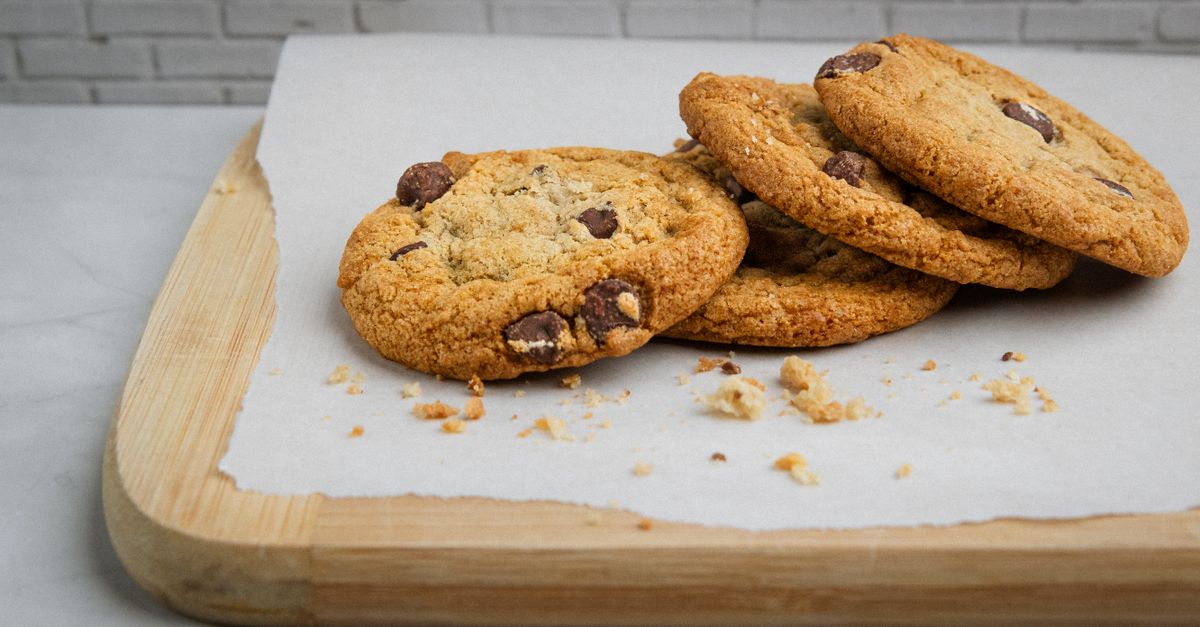
Cookies continue to bake and set as they cool on the hot baking sheet. If you wait until they look perfectly golden and firm in the oven, by the time they’ve cooled completely, they’ll be hard and dry. What you’re aiming for is edges that are just set and lightly golden, while the centers still look pale, puffy, and perhaps even a little glossy or underbaked. They might even wobble slightly when you gently touch them.
My personal strategy is to err on the side of underbaking by about 1-2 minutes from the recipe’s minimum suggested time, especially if I’m using a new oven or recipe. If a recipe says 10-12 minutes, I’ll start checking at 9 minutes. If the edges are set but the center still looks soft, I pull them. Trust the carryover cooking. For years, I feared raw dough, but the residual heat from the baking sheet and the cookie itself does wonders. This method ensures that the internal moisture has nowhere to escape, leaving you with that coveted soft, chewy interior.
Cooling: The Final Frontier of Cookie Perfection
The cooling process, often an afterthought, is just as crucial as baking time for achieving that perfect chewy texture. Most recipes instruct you to let cookies cool on the baking sheet for a few minutes before transferring them to a wire rack. This step is vital for two reasons:
First, as mentioned, the residual heat from the baking sheet continues to cook the cookies gently, allowing them to set without drying out. If you immediately transfer soft, warm cookies to a wire rack, they might fall apart or lose their shape due to lack of structural integrity.
Second, and equally important for chewiness, is the transfer to a wire rack. Leaving cookies on the hot baking sheet for too long (e.g., more than 5-10 minutes) can actually cause them to become overbaked on the bottom. More critically, as the cookies cool, they release steam. If they remain on a solid surface like a baking sheet, this steam gets trapped underneath, leading to a soggy bottom and a less desirable texture overall. A wire rack allows for air circulation around the entire cookie, letting excess moisture escape without drying out the cookie completely, preventing sogginess, and promoting an even, chewy texture.
I’ve found that cooling for 5 minutes on the baking sheet, then transferring carefully to a wire rack to cool completely, is the sweet spot. This allows them to firm up enough to handle, finish their carryover cooking, and then breathe freely to achieve that ideal chewy bite. Don’t rush this step, and don’t stack cookies until they are completely cool, otherwise, you’ll trap moisture and compromise their texture.
Frequently Asked Questions
Q: Can adding an extra egg yolk make cookies chewier?
A: Yes, absolutely! An extra egg yolk is an excellent trick for boosting chewiness. Egg yolks contain fat and emulsifiers that add richness, tenderness, and help retain moisture, resulting in a softer, chewier crumb. If your recipe already uses whole eggs, try replacing one whole egg with one egg yolk plus a splash of milk (about 1 teaspoon) to maintain the overall liquid content while increasing the fat and emulsifiers.
Q: Does chilling cookie dough make a difference for chewiness?
A: Chilling cookie dough certainly makes a difference, though its primary impact is often on flavor development and reducing spread. However, by allowing the flour to fully hydrate and the fats to firm up, chilling can contribute to a slightly chewier texture. It also helps prevent overspreading, which can lead to thinner, crispier cookies. A minimum of 30 minutes, or even overnight, can yield noticeably better results.
Q: My cookies are always too flat and crispy. What am I doing wrong?
A: Flat, crispy cookies often stem from butter that’s too soft, over-creaming the butter and sugar (incorporating too much air early on), or an incorrect flour-to-fat ratio. Ensure your butter is truly room temperature (not melted or greasy), and avoid overmixing once the flour is added. Adding a touch more flour (1-2 tablespoons per cup of flour) or slightly reducing the baking soda/powder can also help create a thicker, chewier cookie. Chilling the dough before baking is also highly effective at preventing spread.
Q: What’s the ideal type of flour for chewy cookies?
A: All-purpose flour is generally the best choice for most chewy cookie recipes. Its moderate protein content (around 10-12%) provides enough structure for a good chew without making the cookies tough or overly cakey. Avoid using bread flour, which has a higher protein content and can result in a chewier but sometimes tougher cookie, and cake flour, which has lower protein and would make cookies too delicate and cake-like.
Q: Can I use softened butter straight from the microwave for my cookies?
A: I strongly advise against using butter softened in the microwave. Microwaving often creates unevenly softened butter, with some parts melted while others remain cold. This inconsistency will hinder proper creaming with sugar, leading to a dough that doesn’t hold air well and results in flat, greasy, and ultimately dry cookies. Always aim for naturally softened, truly room temperature butter for the best results.
Conclusion
Baking truly chewy, delectable cookies is less about magic and more about precision and understanding. By mastering the nuanced art of butter temperature and creaming, adjusting your sugar ratios to favor moisture-retaining brown sugar, pulling your cookies from the oven at that perfectly ‘underdone’ stage, and optimizing your cooling process, you’ll transform your baking. Gone will be the days of dry, crumbly disappointments. Instead, you’ll be met with batches of perfectly soft, delightfully chewy cookies that rival any bakery. It took me years of trial and error to truly understand these principles, but once I did, my cookie game changed forever. Start with just one of these tips in your next batch, and taste the difference for yourself. Happy baking!