When I first started roasting garlic, I was convinced I was doing something wrong. It would come out slightly bitter, sometimes dried out, and never that deeply sweet, spreadable magic I craved from restaurant dishes. I thought it was just a finicky ingredient, reserved for professional chefs with special ovens. For years, I avoided it, opting for raw garlic or garlic powder, missing out on its incredible mellowed flavor that can elevate everything from mashed potatoes to crusty bread.
Then, after countless failed attempts and a deep dive into culinary science, I realized my mistakes were surprisingly simple – and entirely avoidable. It wasn’t my oven; it was my technique, or lack thereof. The secret to truly sweet, unctuous roasted garlic isn’t about expensive ingredients or fancy equipment. It’s about understanding the subtle chemical reactions happening and controlling the environment. What I learned completely changed my approach, turning what used to be a frustrating endeavor into one of the simplest, most rewarding kitchen tasks.
Key Takeaways
- High heat and insufficient oil are the primary culprits behind bitter, dry roasted garlic.
- Slow roasting at a lower temperature allows the garlic’s natural sugars to caramelize fully.
- Proper preparation, including trimming and scoring, ensures even cooking and prevents bitterness.
- Adequate oil acts as a heat conductor and flavor infusion, crucial for tender, sweet results.
The High-Heat, Fast-Track Fallacy (And Why It Leads to Bitterness)
My initial approach to roasted garlic, like many home cooks, was to treat it like any other roasted vegetable: crank up the heat to 400°F (200°C) and let it go until softened. The problem? Garlic, especially when exposed directly to high heat, contains compounds that can easily turn bitter. At aggressive temperatures, the outer layers burn and blacken before the inner cloves have a chance to soften and sweeten. This results in a harsh, acrid taste that’s far from the desired mellow, caramelized flavor.
In my experience, the mistake I see most often is impatience. We want things done quickly, but garlic demands a gentle hand and a lower temperature. The natural sugars in garlic need time to break down and caramelize slowly, a process known as the Maillard reaction, which is what gives roasted garlic its characteristic sweetness and complex aroma. If you rush it, you simply get burnt, bitter garlic.
What changed everything for me was dropping the temperature significantly. I now roast garlic at a consistent 325-350°F (160-175°C). This lower, slower approach allows the cloves to gently cook through, converting starches into sugars without scorching. The difference is night and day: instead of a faint bitterness, you get a deep, almost candy-like sweetness that’s incredibly addictive. It takes longer, yes, usually 45-60 minutes, but the payoff in flavor is immeasurable. Think of it less as roasting and more as a slow, gentle confit in its own skin.
The Overlooked Power of a Proper Trim (Preventing Uneven Cooking & Scorching)
Another subtle but crucial error I made was simply lopping off the very top of the garlic head. While this exposes some cloves, it often leaves others too protected or exposes them unevenly. The goal is to expose all the cloves to the oil and heat, ensuring they cook at roughly the same rate.
When you just slice off the top, some smaller cloves might remain entirely covered by the papery skin or sit too deep within the head. These cloves won’t get enough oil, leading to dry, hard spots, while the more exposed cloves might overcook. It’s a recipe for uneven results and potential bitterness from under-hydrated sections.
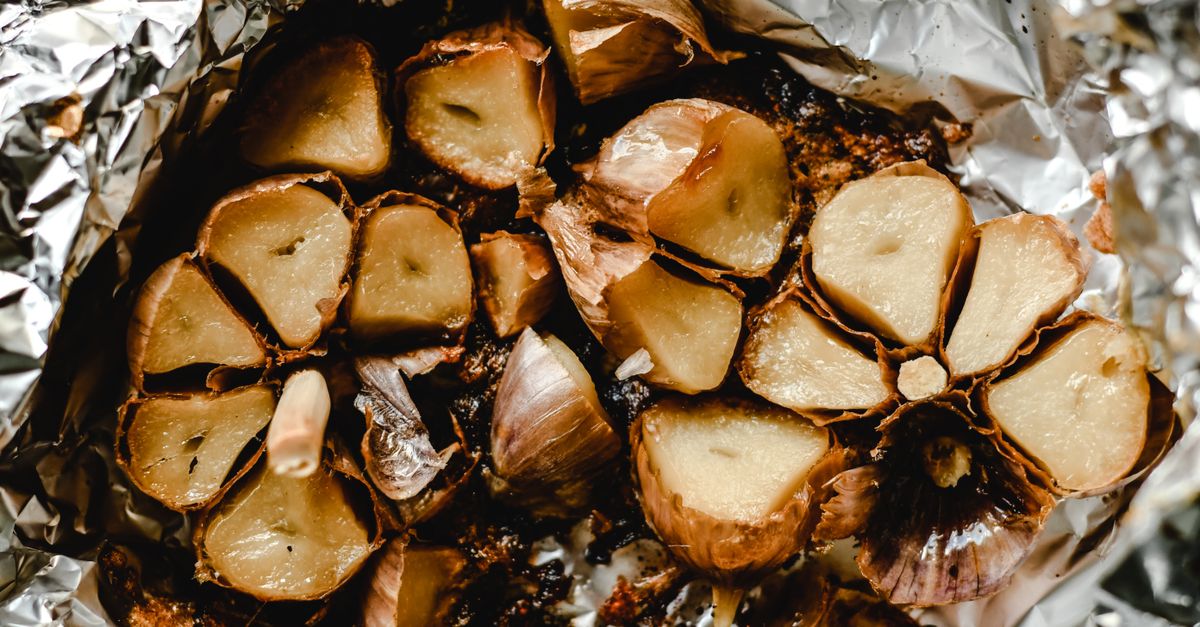
My routine now involves a more deliberate preparation. First, I gently peel off some of the outermost papery layers, but not all of them – you want to keep the head intact. Then, I carefully slice about a quarter to a third off the top of the entire head, ensuring that all the individual clove tips are exposed. Sometimes, this requires a slightly diagonal cut or even a tiny trim on a few stubborn cloves that are hiding. For larger cloves, I might even make a shallow score across their flat top. This exposes maximum surface area for the oil to penetrate and for heat to do its work evenly, resulting in perfectly tender, golden cloves throughout the entire head. This small adjustment makes a monumental difference in the final texture and consistency.
The ‘Drizzle’ Dilemma (Why You Need More Than a Splash of Oil)
For the longest time, I’d give my garlic a meager drizzle of olive oil, thinking I was being health-conscious or preventing greasiness. The truth is, that scant amount of oil isn’t doing enough work. Garlic needs to be thoroughly coated, almost bathing, in oil to achieve that luscious, tender texture and prevent drying out.
Olive oil serves several critical functions in roasted garlic. Firstly, it’s a fantastic conductor of heat, ensuring the garlic cooks evenly and gently. Secondly, it acts as a protective barrier, shielding the delicate cloves from direct, harsh heat which can lead to bitterness. Thirdly, and perhaps most importantly, it infuses the garlic with its own flavor while also becoming infused by the garlic. This creates an incredibly flavorful garlic-infused oil that’s a treasure in itself.
The mistake I consistently made was underestimating the amount of oil needed. What changed everything for me was embracing a more generous application. Instead of a drizzle, I now pour enough olive oil over the exposed cloves to visibly pool around the base of the garlic head, filling most of the exposed crevices. I’m talking a good 1-2 tablespoons per head, depending on its size. This ensures every nook and cranny is coated, creating a humid, flavorful environment within the foil packet that steams and softens the garlic to perfection. The result is garlic that squeezes out like butter, rich with flavor and utterly devoid of any dry, tough spots.
The Foil Folly (And Why a Tight Seal is Your Best Friend)
Many recipes simply instruct to ‘wrap in foil.’ While seemingly straightforward, an improper foil wrap can be another subtle sabotaging factor. A loose or leaky foil packet allows steam and precious garlicky aromas to escape, leading to drier garlic and less flavor infusion.
When the foil isn’t sealed tightly, the moist environment created by the oil and the garlic’s own water content evaporates. This means the garlic isn’t effectively steaming within its protective cocoon, which is key to its tender texture. Instead, it’s exposed to more dry heat, increasing the risk of tough, parched, or even burnt spots. I used to just loosely crimp the edges, thinking it was enough. It wasn’t.
What truly made a difference in my roasted garlic game was realizing the foil packet needs to be an airtight little sauna. After placing the oiled garlic head(s) in the center of a square of foil, I bring up two opposite sides and fold them together tightly, creating a seam. Then, I bring up the other two sides and do the same, making sure all edges are crimped and sealed. I sometimes even double-wrap, especially if I’m roasting multiple heads or using a thinner foil. This traps all the moisture and aromatic compounds, essentially slow-steaming the garlic in its own flavorful juices and oil. The result is consistently soft, deeply sweet, and perfectly caramelized cloves every single time. It’s a small detail, but one that ensures maximum tenderness and flavor.
Frequently Asked Questions
Why does my roasted garlic taste bitter instead of sweet?
Most often, bitterness comes from roasting at too high a temperature, causing the garlic to burn or scorch before it fully caramelizes. Insufficient oil can also contribute to dryness and bitterness, as the cloves are not protected from direct heat.
What’s the ideal temperature and time for roasting garlic?
For truly sweet and mellow roasted garlic, aim for a lower temperature of 325-350°F (160-175°C) for 45-60 minutes. The exact time will depend on the size of your garlic heads and your oven’s calibration, so look for cloves that are deeply golden brown and very soft when gently squeezed.
Do I need to peel the garlic cloves before roasting?
No, it’s best to roast the garlic in its papery skin. You only need to trim about a quarter to a third off the top of the entire head, exposing the tips of the cloves. The skin protects the garlic from burning and helps create a moist environment, while the exposed tips allow the oil to penetrate and the flavors to meld.
What kind of oil should I use for roasting garlic?
Extra virgin olive oil is ideal. Its flavor profile complements garlic beautifully, and it has a high enough smoke point for the recommended roasting temperatures. Be generous with the oil; it’s essential for both flavor and texture.
How can I tell if my roasted garlic is done?
Roasted garlic is ready when the cloves are very soft and squeeze out easily from their skins. They should also be a beautiful golden-brown color, indicating proper caramelization. If they’re still firm or pale, they need more time.
Conclusion
Roasted garlic, when done correctly, is a revelation. It transforms the pungent, fiery kick of raw garlic into a sweet, creamy, and deeply aromatic paste that can elevate an astonishing array of dishes. From spreading it on warm bread to whisking it into salad dressings, stirring it into soups, or mashing it into potatoes, its applications are endless. By simply adjusting your heat, preparing the heads properly, being generous with your oil, and sealing them tightly in foil, you can bypass the common pitfalls and consistently achieve that restaurant-quality sweetness and tenderness.
Don’t make the same mistakes I did for years, settling for mediocre results. Embrace these simple shifts, and you’ll unlock the true potential of roasted garlic, adding an indispensable, flavorful secret weapon to your culinary arsenal. Try it tonight, and prepare to be amazed by the difference a few small changes can make.