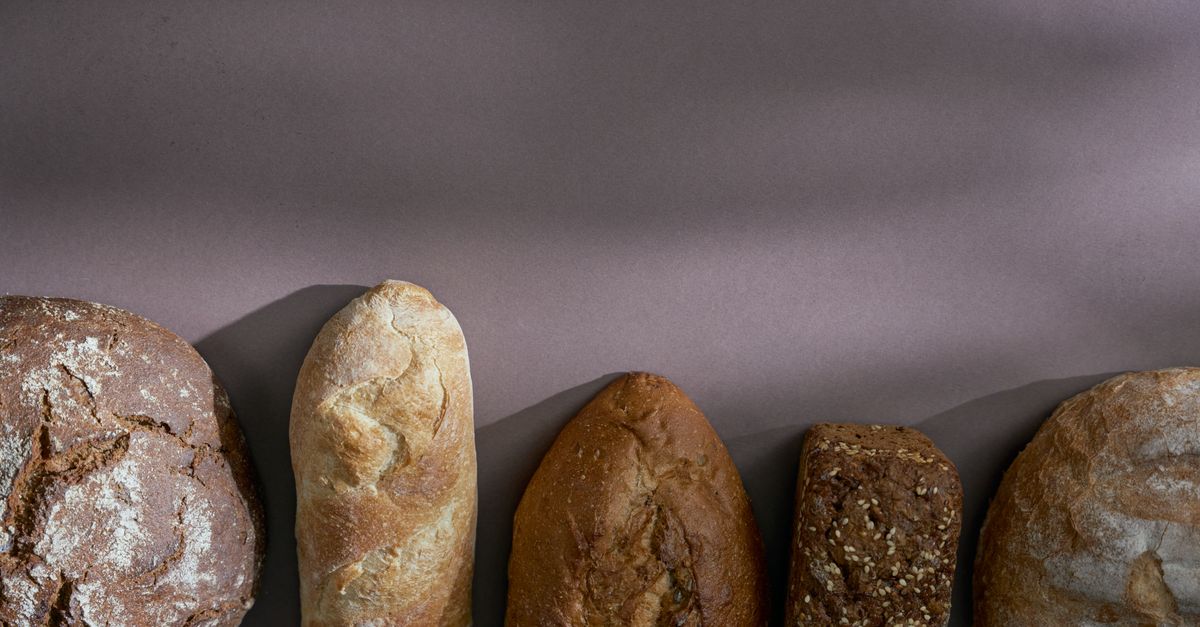
Why Your Homemade Bread Isn't Crusty (And The Pro-Secrets That Deliver Bakery-Quality Crunch Every Time)
You’ve spent hours kneading, proofing, and lovingly shaping your homemade loaf, picturing that perfect, crackling crust you dream of. But when it emerges from the oven, instead of a deep, golden, audibly crunchy shell, you’re met with… something soft. Maybe a little pale. It tastes good, sure, but it’s not that crust. The one that shatters when you slice it, sending crumbs across the counter and releasing that incredible aroma. I know this feeling intimately, because for years, my homemade breads suffered from the same soft-crcrust syndrome. I tried different recipes, varied baking times, and still, that elusive crunch remained just out of reach.
The mistake I see most often, and one I certainly made myself, is focusing solely on the internal crumb structure while treating the crust as an afterthought. Many home bakers think a crust just happens as the bread bakes. But achieving a truly outstanding, deeply browned, and satisfyingly crunchy crust is a precise science, influenced by a few critical factors that are often overlooked. It’s not about buying a fancy new oven; it’s about understanding and manipulating moisture and heat in specific ways.
What changed everything for me was a simple shift in perspective: I started treating the crust as a separate, equally important component of the bread, not just the outer layer. Once I understood the specific conditions necessary for robust crust development, my bread baking was revolutionized. Now, every loaf I pull from the oven boasts a crust so substantial, you can almost hear it whispering bonjour.
Key Takeaways
- Insufficient steam early in the bake prevents proper crust development and creates a soft exterior.
- Lack of direct heat and too much residual moisture are major culprits behind pale, chewy crusts.
- Controlling oven temperature stages and using specific baking vessels are crucial for optimal browning and crunch.
- An immediate cooling process after baking is essential to prevent moisture migration back into the crust.
The Overlooked Power of Steam: Why Your Oven Needs a Sauna
When I first started baking, I’d just pop my shaped dough into the oven, set the temperature, and hope for the best. The results were predictably soft-crusted. The biggest missing piece? Steam. This might sound counter-intuitive – why would you add moisture to get a crispier crust? Here’s the science: for the first 10-15 minutes of baking, steam keeps the surface of the dough moist and pliable. This allows the dough to expand fully, a process called “oven spring,” without the crust hardening too quickly and cracking prematurely. If the crust hardens too fast, it restricts expansion, leading to a denser crumb and, ironically, a less developed, softer crust because the sugars on the surface don’t have enough time to caramelize properly later on.
In my experience, the mistake most people make is either not adding steam at all, or adding it ineffectively. A shallow pan of water in the bottom of the oven simply isn’t enough. You need a lot of concentrated steam. My breakthrough came when I started using a Dutch oven or a covered baking cloche. These create a mini-steam oven around the loaf, trapping the moisture released by the dough itself and concentrating it precisely where it’s needed. If you don’t have a Dutch oven, another highly effective method is to preheat a cast iron skillet or a tray of lava rocks/clean stones on the bottom rack, and carefully pour a cup of boiling water into it just as you load your bread. Close the oven door quickly to trap the steam. I personally love the Dutch oven method for its simplicity and superior results – no fumbling with boiling water while a hot oven gapes open.
After that initial steaming period (typically 15-20 minutes, depending on the recipe and loaf size), you need to remove the lid or the source of the steam. This is critical. Why? Because once oven spring is complete, the goal shifts from pliability to dehydration and browning. If steam persists, the crust remains soft and never gets the chance to crisp up. It’s a two-stage process: steam for expansion, then dry heat for crisping and color.
The Maillard Reaction & Caramelization: More Than Just ‘Brown’
Many home bakers, myself included in my early days, settle for a pale golden crust. We pull the bread when it looks “done,” but often that’s not enough for true crust development. The deep, rich color and complex flavor of a bakery-quality crust come from two chemical reactions: the Maillard reaction and caramelization. These reactions are responsible for the hundreds of flavor compounds that develop when sugars and amino acids on the surface of the bread are exposed to high heat. A pale crust indicates these reactions haven’t fully occurred, meaning you’re missing out on a significant part of your bread’s potential.
The key to unlocking these reactions is sufficient baking time at the right temperature, and crucially, direct heat. In my kitchen, I’ve found that preheating my oven with my baking vessel (Dutch oven, baking steel, or pizza stone) for at least 45 minutes to an hour at a high temperature (typically 450-500°F / 230-260°C) is non-negotiable. This super-hot surface delivers an immediate thermal shock to the dough, initiating rapid browning and creating that desirable thin, crispy layer right from the start.
Once the steam phase is over, I often reduce the oven temperature slightly (to around 425-450°F / 220-230°C) and continue baking, uncovered, until the crust reaches a deep, almost mahogany brown. Don’t be afraid of color! A well-caramelized crust often looks darker than you might initially think is appropriate. If you’re unsure, tap the bottom of the loaf – it should sound hollow. My rule of thumb is: if it looks “done,” it probably needs another 5-10 minutes for optimal crust development. This extra time allows those crucial flavor-developing reactions to complete.
The Cooling Conundrum: Don’t Trap That Steam!
This is perhaps the simplest, yet most frequently sabotaged, step in achieving a truly crusty loaf. You’ve done everything right: perfect steam, robust browning, and a hollow-sounding thump. You pull that beautiful loaf from the oven, and what do you do? Many people, eager to slice into their masterpiece, place it on a solid surface or, worse, wrap it while it’s still warm. This is a fatal error for crust development.
Bread continues to cook and release steam as it cools. If you place a hot loaf on a solid surface like a cutting board or a countertop, that escaping steam gets trapped underneath. It condenses, turns back into water, and softens the bottom crust, making it gummy and chewy. The same thing happens if you wrap a warm loaf – the entire crust gets steamed from the inside out.
What changed everything for me was the simple act of using a wire cooling rack. Immediately after removing my bread from the oven, it goes directly onto a wire rack, completely exposed to air on all sides. This allows the steam to dissipate evenly, preventing condensation and preserving the crispness you worked so hard to achieve. I also resist the urge to slice it for at least 60-90 minutes, or even longer for larger loaves. This cooling period is not just about avoiding burned fingers; it allows the internal structure to set and the moisture to redistribute from the crumb to the crust, further firming it up. Slicing too early can release too much internal steam, leading to a denser, gummier interior and a softer crust.
The Baking Vessel Advantage: Beyond the Bare Oven Rack
While a standard baking sheet can bake bread, it’s not designed for optimal crust development. Achieving that commercial bakery-level crust often requires a specialized baking environment. My initial attempts with bread on a simple tray were always underwhelming – pale bottoms and less consistent browning.
The game-changer for me was investing in a good quality Dutch oven. The heavy cast iron retains and radiates heat incredibly effectively, creating an intensely hot environment around the entire loaf. As I mentioned earlier, the lid traps steam in the initial phase, and removing it allows for dry heat to develop a deep, even crust. A 5-quart or 6-quart enameled cast iron Dutch oven is perfect for most standard loaf sizes and will last a lifetime.
If a Dutch oven isn’t in your budget or you bake very large loaves, a baking steel or a thick pizza stone placed in the oven during preheating can dramatically improve your crust. These materials also store and transfer a massive amount of heat directly to the bottom of your loaf, ensuring a robust, deeply browned bottom crust that often gets overlooked. For adding steam with a baking steel/stone, I use the method of pouring boiling water into a preheated pan on the bottom rack. The key is consistent, intense heat from all directions.
I’ve also experimented with placing a small, heat-safe dish of water and a few ice cubes in the bottom of a preheated Dutch oven without dough for 5 minutes before adding the dough and covering. This creates an even more potent burst of initial steam, leading to a wonderfully blistered and shiny crust. The choice of baking vessel isn’t just about convenience; it’s a deliberate tool to control temperature, humidity, and heat transfer, all of which directly impact that coveted crust.
Frequently Asked Questions
Q: My bread crust is hard, but not crispy. What am I doing wrong?
A: This usually indicates a lack of sufficient steam during the initial bake combined with prolonged dry baking. Without enough steam, the crust forms too quickly and thickly, becoming hard and leathery rather than thin and crisp. Ensure you’re generating ample steam for the first 15-20 minutes, then bake uncovered to dry and crisp it.
Q: Can I achieve a great crust without a Dutch oven?
A: Absolutely! While a Dutch oven is highly effective, you can achieve excellent results with a baking steel or pizza stone. For steam, place a metal pan on the bottom rack, preheat it, and carefully pour a cup of boiling water into it when you load the bread. Just make sure to remove the pan and vent the oven after the initial steaming phase.
Q: Why does my crust go soft after a few hours?
A: This is a common issue, often due to moisture migration. As the bread cools, moisture from the interior crumb can move back into the crust, softening it. Ensure thorough cooling on a wire rack immediately after baking. If you want to refresh a crust, a quick 5-10 minute bake in a 350°F (175°C) oven can often restore its crispness.
Q: How dark should my crust really be?
A: Don’t be shy with color! A truly flavorful, crunchy crust should be a deep golden-brown, sometimes even a reddish-brown or mahogany. If it looks barely golden, it’s likely underbaked for crust development. The darker the color (without burning, of course), the more flavor and crunch will have developed from the Maillard reactions and caramelization.
Q: Should I use an egg wash or milk wash for a crusty bread?
A: Egg washes and milk washes are excellent for adding shine, color, and sometimes a softer, richer crust, particularly on enriched breads like challah or brioche. However, for a crusty artisan-style loaf, these washes can actually prevent the desired crackling texture. Plain water misted on the dough before baking (during the steaming phase) can help, but generally, for maximum crunch, rely on steam and dry heat rather than washes.
Making truly crusty bread isn’t a magical act; it’s the result of understanding and mastering a few key environmental factors. By controlling steam, leveraging intense direct heat, allowing for proper browning, and cooling correctly, you’ll transform your loaves from good to utterly extraordinary. The next time you pull a loaf from the oven, listen for that satisfying crackle – it’s the sound of your success. Now, go bake some bread and enjoy that glorious crunch!
Written by Clara Jenkins
Baking, desserts, and comforting classics
A former pastry chef turned home baker, Clara brings precision and a sweet touch to every recipe.
You Might Also Like

Why Your Homemade Pizza Crust Lacks That Perfect Chew (And The Simple Pro-Secrets That Deliver pizzeria-Quality Results)
Ever wonder why your homemade pizza crust isn't chewy like your favorite pizzeria's? Discover the secrets to a perfectly chewy crust.